It's time for another blog post about up-cycling sweaters! As you may remember, I had several sweaters set aside for up-cycling projects, but there were so many projects, I realized it would be better to split them up into a series. Part One was all about making leg warmers. You can find the first post about how to make leg warmers and boot socks.
This time, I want to show you a couple of accessories that I made.
Here's the sweater before:
It's actually a skirt. I found it when I went thrifting recently. The skirt was adorable, and in such good condition that I had to get it, even though it was too small for me.
This skirt was turned this into a cute hat, and matching mittens. This is how I did it:
First turn the skirt inside out (I used the waistband of the skirt as the brim of the hat so that way I wouldn't have to hem the bottom). Then trace the outline of the hat with a white pencil or chalk.
Pin it, sew it up, and trim off the extra fabric. (I forgot to serge the trimmed edges, but I would recommend it to prevent unraveling in the washing machine...or you could wash it by hand...every single time. But who want to do that???).
Now for the mittens.
I used the bottom part of the skirt (or the opposite end) for the mittens. Place your hand on top of the fabric and trace around your hand, fingers, and thumb to make a mitten shape. Then pin around the mitten shape (unless you have amazing confidence in your sewing skills, which I do not).
Sew that bad boy up, and trim the excess fabric. Repeat that whole process again with the other hand, because you want two mittens, not just one...unless you only have one hand. In that case you do not need to make another one. ;) (Remember, serging all the trimmed edges is a good idea, even though I forgot to do that).
And here are the finished products. My husband told me the mittens resemble saguaro cactus. I think he is right, but that is due to the fact that my sewing skills leave something to be desired. And the fact that I have a hard time following the line I traced when using the sewing machine. Ha ha.
After I finished, my son found the hat, and insisted on wearing it. He calls it the "Star Hat," because he thinks the "X's" on the fabric are stars.
I think I may let him have the hat, since he likes it so much.
Tuesday, January 31, 2012
Saturday, January 28, 2012
Super Hero Cape
Super-hero capes are supposed to be a staple in every little boy's wardrobe, right? At least I thought so. But I'm starting to think that somehow The Toddler does not agree with me...
We cut this cape out of an XL T-shirt I bought for 50 cents at a flea market last fall (I knew I could find a use for that shirt!), and we used acrylic paint on the fabric. (I've learned from experience that acrylic paint does not wash off of fabric, so I figured this would be appropriate to use it this time) :) The circle part of the cape is the collar from the T-shirt.
I've seen blogs and pins peppered with comments from numerous moms who said their little guys love or would love super hero capes. I thought mine would too.
Well he actually LOVED making the cape - or maybe I should say he loved painting it.
This turned out to be a fun afternoon project for myself, The Spouse, and The Toddler. Keep in mind that it's important to supervise your child while they use acrylic paint. Otherwise they may end up like this:
But after we finished painting and the cape was dry, The Toddler would have nothing to do with the cape.
At one point I convinced him to put on, but as soon as I pulled out the camera, he ripped the cape off and said, "I no want to take a picture." (This is the ONLY picture I managed to capture with him - notice the cape falling on the floor - he had just yanked it off his head as I pulled the camera out).
Or maybe not. I had so many cute photo ideas to try with him wearing his cape, but apparently The Uncooperative Toddler had different ideas.
Oh well.
He hasn't even touched the cape since I tried to take his picture. I've tried a couple of times to get him to wear it again. But I am always prevented with a firm "NO" by him.
At least we had a good time painting it!
I think my child may have a future as an artist. ;)
Labels:
cape,
kid activities,
super hero,
t-shirt,
toddler activities,
upcycle
Wednesday, January 25, 2012
The Upcycled Sweater Series Part 1 - Leg Warmers and Boot Socks Tutorial
I have a couple of sweaters that I've set aside for projects. I added a couple more to my collection when I went thrifting over the weekend. Today started out to be a windy day, so I decided this would be the perfect day for a project or two or three. I made several items from my sweater collections, but there were too many to put them all in one post. And I'm not finished. So I've decided to do a series on the up-cycled sweater items I made. I've seen leg warmers ALL OVER the internet, so of course, I had to make some too!! So today I'm going to start with a tutorial about making leg warmers and "boot socks." Check it out this DIY:
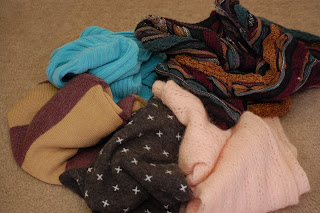
So fun, right? Below is the pile of sweaters I've acquired. So much potential
This was a thrifted sweater before up-cycling:
And this is how I made the leg warmers:
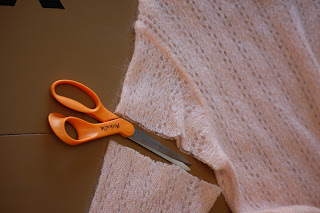
Start by cutting off the sleeves.
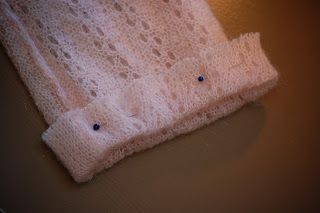
Turn the sleeves inside out and pin the end that you cut from the sweater.
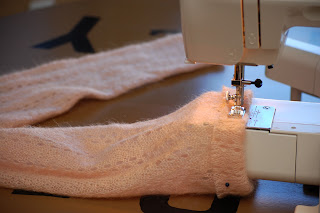
Sew it...in a straight line. Easier said than done (At least for me). I'm not that good at sewing.
The finished product!
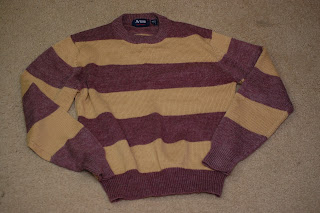
I also made some from this sweater (My father-in-law gave this one to me. I don't think he wanted it anymore) :
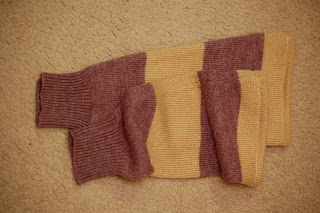
And I used the same instructions from above.
Ta-Dah!!
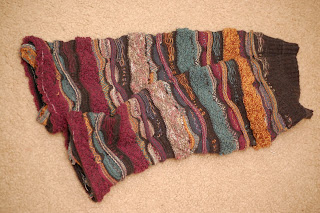
And finally, the crazy sweater - my mom bought this for my dad several years ago, but he refused to wear it. My brother said it looked like the knitting machine blew up when it was being knit. It probably did. (I also think he got that line from the Princess Diaries movie. He is proabaly going to kill me for saying that on my blog now). Ha ha.
I am definitely looking forward to wearing all these. :)
Be sure you also check out these tutorials on how to make a Hat and Mittens, Arm Warmers and Fingerless Gloves, a Sweater Vest and Infinity Scarf, and turn a Sweater into a Skirt.
Liked the post? Let me notify you of new posts. Don't worry, I hate SPAM and won't abuse your email address. :)

So fun, right? Below is the pile of sweaters I've acquired. So much potential
This was a thrifted sweater before up-cycling:
And this is how I made the leg warmers:
Start by cutting off the sleeves.
Turn the sleeves inside out and pin the end that you cut from the sweater.
Sew it...in a straight line. Easier said than done (At least for me). I'm not that good at sewing.
I've read several tutorials that tell you to wear the bottom of the sleeves (the part that sits at your wrists) at the top of your calves when wearing them as leg warmers. That didn't work well for me. Maybe I have big calves, but the "wrist" end of the sleeves were too small for my calves. So I wore them the opposite way - with the "upper arm" end at the top of my calves.
I also made some from this sweater (My father-in-law gave this one to me. I don't think he wanted it anymore) :
And I used the same instructions from above.
Ta-Dah!!
And finally, the crazy sweater - my mom bought this for my dad several years ago, but he refused to wear it. My brother said it looked like the knitting machine blew up when it was being knit. It probably did. (I also think he got that line from the Princess Diaries movie. He is proabaly going to kill me for saying that on my blog now). Ha ha.
I also turned the sleeves inside out and hemmed the top, just like I did with the previous two sets, but the sleeves were huge near the shoulders. So when I turned these inside out to hem the ends, I also took in a couple inches along the side (the length, as in top to bottom) to get a better fit.
I am definitely looking forward to wearing all these. :)
Be sure you also check out these tutorials on how to make a Hat and Mittens, Arm Warmers and Fingerless Gloves, a Sweater Vest and Infinity Scarf, and turn a Sweater into a Skirt.
Liked the post? Let me notify you of new posts. Don't worry, I hate SPAM and won't abuse your email address. :)

Labels:
Boot Socks,
create,
diy,
Leg Warmers,
sweater,
upcycle clothing
Monday, January 23, 2012
Bargain Shopping Overload
I went shopping this weekend. But not your typical kind of shopping - it was serious bargain hunting. I found out about a sale at a second hand clothing store called, Other Mothers. They were having a Quarter Sale - meaning everything was only a quarter! But it wasn't in the regular part of their store, it was in the back of their store. And this was what it looked like:
Mountains of clothes piled onto tables. Just like a glorified garage sale. Scary, right?? I thought so. I almost turned around and walked out the door. I'm the type of person who likes clothes presented in a nice organized fashion when I shop. Sifting through piles of clothing is almost unbearable. And completely stressful. But this time, even though I felt completely overwhelmed, I gathered up my courage and dug in. If I only had to pay a quarter for each article of clothing, surely I could do this. My mom came and helped me sort through all the piles. We went through ALL of those piles and found tons of clothing. And this is what we ended up with:
Two bags filled with approximately 100 articles of clothing. Some of the clothes was for me, but most of it was for The Toddler - for the next two years - all for a whopping price of $28!!! We found some major scores there - clothing from Osh Kosh, The Children's Place, Calvin Klein, and more. It was great. Here are a couple of my personal favorite finds:
I know this sweater looks like it belongs at an Ugly Sweater Christmas Party, but I think it's great! It's a hand knit sweater from Norway. It looks so crazy, but I just couldn't resist! I think I might take in the sleeves for more of a fitted look.
And I also found an awesome vintage Oscar de la Renta velour shirt! LOVE.
I wouldn't say that sifting through piles of clothes is my cup of tea, but it was definitely worth it! But I'm not planning on doing this again next weekend. :)
Labels:
bargain,
everyday life,
Other Mothers,
shopping,
thrift store,
thrifting,
vintage
Thursday, January 19, 2012
Things to Not Do:
I need to tell you that I am really, really wise. Or maybe not so much. But I try. So I thought I should impart some of my amazing wisdom that I have acquired. Prepare to be blown away by these profound thoughts. It will change your life. Just in case you haven't figured it out, I am totally being sarcastic.
Things I don't recommend that you do:
Things that I think you should do:
Feel free to contribute to either list.
Things I don't recommend that you do:
- Sleep in so long that you feel tired for the rest of the day. I know it sounds tempting, but trust me. It's a bad idea.
- Allow your child who still takes naps to skip their nap. Every once in a while I succumb to peer pressure and allow my child to skip his nap. This is NEVER a good idea. NEVER. I let him skip it yesterday and by the end of the day he was bananas! And drove me bananas. Fortunately I called my parents and ditched him with them. Ha ha.
- Binging on sugar. Massive crash. Blahhh.zzzzzzzzzzzzzzzzzzzz.
- Procrastinate on updating and/or balancing your checkbook for 5 months. This is bad. bad. Bad. BAD.
- Allowing your potty-trained toddler to take himself to the bathroom and then avoid checking on him for 5 silent minutes. You never know what they will come up with to do in there. (unroll all the toilet paper, play with the toilet brush wand, rub lotion all over their shirt, and pee all over a 2 foot area.)
- Saying words you don't want your toddler to repeat - even words that aren't bad. Example - "Oh crappy, Crappy, CRAP!" Yes I actually said that. (leave me alone). You never know when those words will sneak out of their mouth.
- Getting a mullet...not that I have, because I haven't. But I'm just saying that you shouldn't.
- Food battles with your toddler...AHHHHHHH!!!
Things that I think you should do:
- Make a nose out of Play-doh and stick on your child. It's awesome
- Sit your toddler on the driveway with their car seat and tell your parents to come and pick him up...wait...that sounded mean. I didn't mean it like that. I meant it in a fun way...Are you confused? Oh well.
- Soak in the bathtub. Because it's awesome.
Feel free to contribute to either list.
Labels:
everyday life,
kids,
mom stuff,
motherhood,
toddler
Tuesday, January 17, 2012
Marble Run
I came across the Marble Run idea on Pinterest several months ago and started saving all my cardboard tubes. We didn't get around doing this activity until recently. Not only did The Toddler LOVE this activity, but so did the spouse and I! It's problem solving game to see just how you can get your marble to run all the way through the tubes without falling out.
We used acrylic paint (because that's all we have) and allowed The Toddler (equipped with a bib) to paint the tubes. And we painted them too. Because it was fun.
Be aware that if you give your child more than one color at a time, they may end up dipping their brush in EACH color before they actually begin painting.
And all those pretty colors may end up looking more like a greyish-olive green.
Like the paint on these tubes. But it's really ok, because this activity really isn't for us, it's for the kids...right? Right....
After the paint was dry, I hot-glued the magnets onto the tubes.
And then we put the tubes on the fridge
and played with them!
And when you are done with your tubes, you can also do this. What more could a kid ask for?
:)


We used acrylic paint (because that's all we have) and allowed The Toddler (equipped with a bib) to paint the tubes. And we painted them too. Because it was fun.
Be aware that if you give your child more than one color at a time, they may end up dipping their brush in EACH color before they actually begin painting.
And all those pretty colors may end up looking more like a greyish-olive green.
Like the paint on these tubes. But it's really ok, because this activity really isn't for us, it's for the kids...right? Right....
After the paint was dry, I hot-glued the magnets onto the tubes.
And then we put the tubes on the fridge
and played with them!
Ahhh!!! Rolling marbles through this is so much fun, I can hardly stand it!!
:)


Subscribe to:
Posts (Atom)


