So Here's My Life

The things we make,
the food we eat and
the shenanigans in between.

A blog about making things by
MICHELLE SEXTON

Thursday, October 31, 2013

Magnet Craft made from Party Favors

I made something. Completely pointless, but oh-so-fun. I turned party favors into fridge magnets. I know this isn't a huge hardship or anything, but my refrigerator had some ugly magnets - the business card size with advertisements. So, I decided enough of these ugly magnets! Let's make something better. I bought a couple packages of cute little party favors at the Dollar Store for $1 a piece and a package of button magnets at Walmart for $1 or $2. So inexpensive. (Just a side note here, but if you are interested in another magnet craft for kids, check out the Marble Run I did with Mac a couple of years back.)

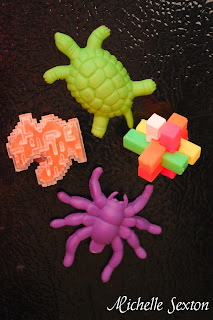
party favors turned into magnets
Additional bonus alert - this is a great activity to do with your kids...as long as you trust them with a glue gun. If you don't, then you should make them yourself when they're not around. Just for the record, I do not trust Mac with a glue gun. Actually, now that I think of it, he probably could manage to do this craft with a bit of supervision. But, I think I would recommend this activity for older kids - as in the non-preschool age. The age where you trust them to not burn themselves or their sibling with a glue gun. ;)

I think this activity is pretty self-explanatory, but just for the sake of explaining, here's how I did it:

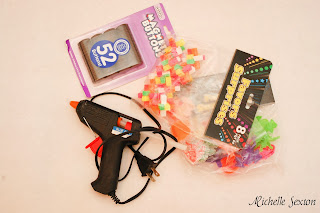
party favor magnet supplies
Supplies:
- party favors 
- hot glue gun & hot glue sticks
- button magnets

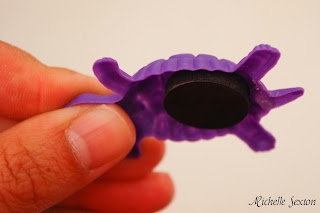
magnet glued underneath turtle

glued puzzle magnet
Using the hot glue gun, glue a magnet to the bottom of each party favor, making sure the magnet stays flush with the bottom of the party favor. 

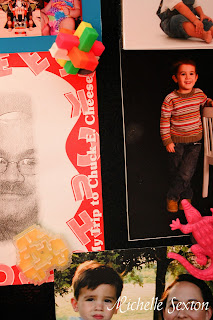
party favor magnets on fridge

more party favor magnets on fridge
Allow glue to dry and replace the old tacky fridge magnets with these new fun ones! 

four party favor magnets on the fridge
These magnets are also a great way to keep your little ones entertained. They would be a great activity to use in the car with a cookie sheet they could stick the magnets on. 

Have fun!

Tuesday, October 29, 2013

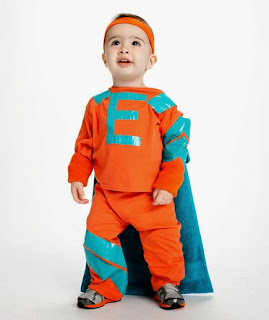
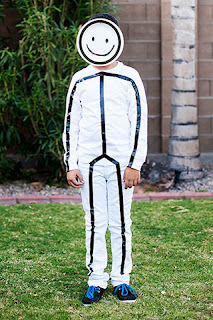
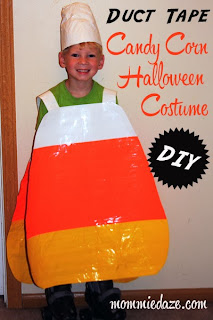
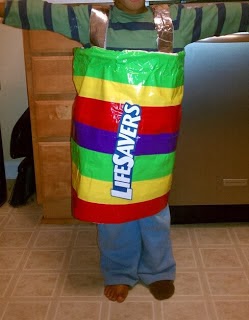
11 Easy to Make Halloween Costumes for Kids made from Duct Tape

This weekend I had a realization - Halloween is less than a week away. Nooooooo! This realization gave way to feelings of dread. I am not ready for Halloween. I only have one costume for one child. At this point I'm not willing to take the time to work on a cute but time consuming Halloween costume project. Are you with me? So here are 11 kid's Halloween costumes for all of us parents who have procrastinated in the costume department. But wait...they are also made from Duct Tape - So much easier, right?
Duct Tape Super Hero Costume
The Super-Hero 

Stick figure costume made with Duct Tape
The Stick Figure 

Skeleton Costume made with Duct Tape

pizza slice costume made with Duct Tape

Zebra and Lion Costumes Made from Duct Tape

Candy Corn costume made from Duct Tape

Duct Tape Life Savers Costume
The Roll of Life Savers

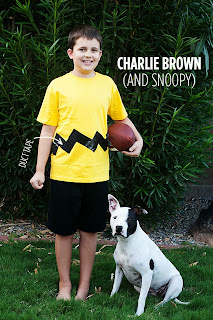
Charlie Brown Duct Tape Costume

Bacon and Egg costume made with Duct Tape

Watermelon slice costume made from Duct Tape
The Watermelon Slice

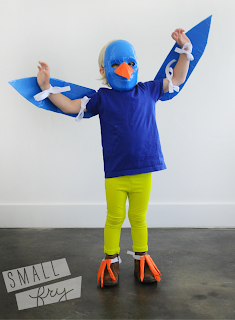
Bird Costume Made from Duct Tape

See, now you have some options. It's ok procrastinating parents - go get some Duct Tape. Feel better? ;)

P.S. I think I am going to do the Stick Man. Because Cheese is too little to have much of an opinion on what he wears...and it's quick and easy. Ha!

Thursday, October 24, 2013

Fall-Themed Painted Leaves

Have your trees lost their leaves yet? Ours haven't. I think we have another week or two before that happens. But, let me tell you, Fall leaves are gorgeous, don't you think? Today, I have a leaf-inspired kids' craft. Leaves have such amazing shapes, so we decided to display them by painting over them to create outlines. But wait...it gets better. Instead of painting it on with a regular old paint brush, we poured it into a bottle and sprayed it on. Upgrade!  (I've been doing a lot of kids crafts lately, like the Cookie Cutter Pumpkin and the Eyeball Candle Holder Jars. I think that Fall just inspires me to be creative...probably because I'm no longer sweltering from the summer heat and my brain senses the relief!)

So check it out: leaf shapes, fall colors, and paint.

 You will need:
- paper (we used standard printer sized paper)
- an assortment of leaves (small ones work better than large ones)
- masking tape (double sided would be better, but we didn't have any)
- spray bottles
- 1/4 cup cornstarch
- 1 cup of warm water
- food coloring

To make the paint, combine water and cornstarch with your food color preference. We made orange and red paint. Add the paint to the spray bottles and set aside.


press taped leaves to paper

Leaves taped onto paper
Next, add tape to the underside of each leaf and press them onto the paper. I recommend spreading them apart to create more dynamic shapes. Make sure the leaves lay flat on the paper. Use enough tape to keep the corners of the leaves from curling up.
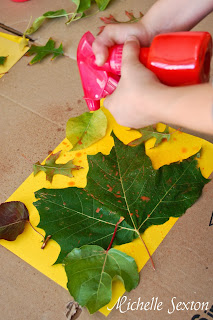
Spraying paint onto leaves and paper

Paint sprayed onto leaves
Using the bottle filled with paint, spray each paper with paint.

Remove leaves once paint has dried
Allow paint to dry completely before removing leaves.

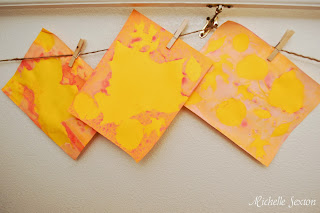
Leaf outlines
 
Leaf pictures on display
Display so everyone can admire!

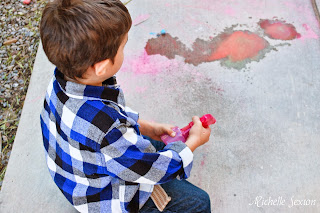
painting the side walk with "chalk paint"
P.S. If you have leftover paint, you can also use it on the sidewalk for sidewalk spray paint chalk. I allowed Mac to use the rest of it outside, and he ended spraying the sidewalk, the trees, the bushes, my foot, and the house. (I cut him off after our house got some additional color) AND since the paint is made with food coloring, water, and cornstarch, it's non-toxic...which is great if your kid has a habit of eating paper.

A couple of additional tips:
-We used standard sized printer paper, but the larger the paper, the more leaves you can fit on a paper, and the more fun your project will be.
- The paint recipe is similar to a chalk recipe. So if you drench your paper in paint, it will end up flaking off. Don't drench the paper. OR you could try a different kind of liquid paint. I chose this paint because it was quick and easy to make.

the Grant life

Tuesday, October 22, 2013

Simple Pumpkin Carving Using Cookie Cutters

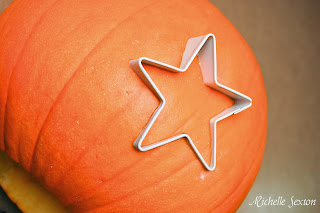
Pumpkin Season has definitely arrived. Rejoice friends! Let's carve a pumpkin or two to celebrate. This year, instead of hacking away at the pumpkin with a knife, I decided to try something a little more simple - cookie cutters. What? For real. I used a cute 1 inch tall star-shaped metal cookie cutter to make nice, uniform shapes around my pumpkin. So fun and pretty easy. Plus, it's a great way to get your kids involved in the pumpkin carving process, as opposed to the alternative - carving away as your child watches you (because you don't trust them with a knife).


star pumpkin with small pumpkins

Interested in trying it out? Here's how I did it:

pumpkin carving supplies

Supplies needed:
- Pumpkin (with top removed and the insides cleaned out)
- Metal cookie cutter
- block of wood
- hammer
- knife (I recommend a pairing knife)

Carving a pumpkin using a cookie cutter

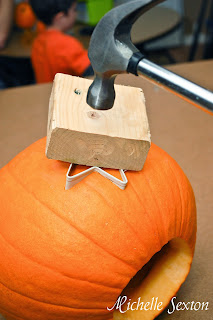
Place cookie cutter on top of the pumpkin, and the block of wood over the cookie cutter. Using the hammer, pound on the wood block until the cookie cutter has been pressed about half way down into the wall of the pumpkin. (Since pumpkins are round, it won't be able to be pressed in flush.) Be sure to leave about 1/8 of an inch of the cookie cutter sticking out.

star cookie cutter pressed into pumpkin
Pull the cookie cutter out. You'll probably have to wiggle it out.

Knife cutting pumpkin
Finish cutting through the wall of the pumpkin using a knife by following the outline made from the cookie cutter. Once the cookie cutter shape has been cut all the way through, push the shape out, pushing from the inside to the outside. Repeat this process as much as you like around the rest of the pumpkin.

 star carved pumpkin
By the way, if you cut too many shapes into the pumpkin, it will end up weakening your pumpkin, which may result in the pumpkin breaking apart. I would recommend leaving a minimum of 2 inches between each cutout. Keep an eye on the pumpkin as each shape is cut and watch for cracks on the opposite side.

Mickey Mouse Pumpkin
By the way, as I was working on my star shaped pumpkin, my husband and Mac were working on a Mac's pumpkin. After searching through numerous photos of pumpkin carvings online, Mac was absolutely certain that he wanted a Mickey Mouse pumpkin. My husband was less than thrilled. Lots of cutting. (super amusing to watch though.) But just in case you interested in trying Mickey Mouse, you can find the template here.

Star pumpkin and Mickey Mouse Pumpkin
Have you guys decorated your pumpkins yet? How did you decorate them?

Liked the post? Let me notify you of new posts. Don't worry, I hate SPAM and won't abuse your email address. :)


nap-time creations
 photo partybutton1_zpsaf59da8f.png

Thursday, October 17, 2013

10 Fall Themed Activities for Kids

Fall is a great time of year. It seems that so many people find creative inspiration from the rustic colors, the cooler weather, and even the flavors that make an appearance during this season. Let's take this inspiration and pass it on to our kids. Last week, we made Eyeball Candle Holder Jars for the Fall season. This week, I've compiled a list of 10 fun Fall activities that you can do with them to encourage their creativity.

Fall Leaf Lantern
Fall Leaf Lantern  - When I first saw this, I was like, "This is so awesome! Why didn't I think to do this?" Then, I was like, "Oh yeah. We live in the desert. We don't have leaves like that near us...and they haven't changed colors yet." But seriously, this project is so cute. I think that Mac and I are going to have to go on a leaf hunt in a week or so when more of the trees begin to change colors.

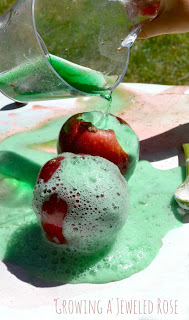
Making a volcano from an apple
Apple Volcanoes - I think I need to go and dig those old apples out of the trash that I tossed this morning. Both of my boys would love to do this. Volcanoes from apples? How fun is that?

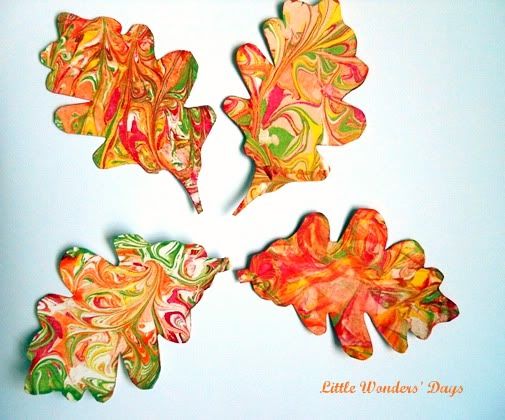
Leaves painted with shaving cream
Shaving Cream Painted Fall Leaves - Shaving cream is one of the coolest things to play with. We've used it to paint in the bathtub before and Mac had a blast. Using shaving cream and paint is another creative way to play.

Pumpkin Moon Sand Recipe
Pumpkin Moon Sand  - It's like playing with sand and play-doh at the same time! When you add food coloring and pumpkin spice, this moon sand becomes even cooler. I think the biggest issue you may have is convincing your little ones that they can't eat it!

Rice Krispy Candy Corn Treats
Crispy Rice Candy Corn Treats - Do your kids like to help when you cook and bake? Mac does. He loves to measure and dump the ingredients. This is a terrific recipe to do with kids.  Also, it has candy corn - that wonderfully sweet & addictive Fall candy that you can't seem to stop eating until you feel sick. Ha!
 
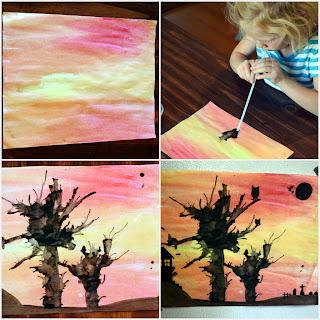
watercolor paintings
Watercolor and ink-blown Shadow trees - What a fun idea! You know how we always forbid our children from blowing bubbles in their milk with a straw? Here's a great alternative that should satisfy their straw-blowing desires. Painting with straws!!!

Apple Smiles snack
Apple Smiles - Ever since I made Toasted Marshmallow S'mores Hot Cocoa, Mac has been requesting marshmallows at snack time on a daily basis. Here's a better alternative that will satisfy your kids' marshmallow cravings as well as give them a bit of nutrition. The real question is whether Mac will enjoy making this more than eating it...

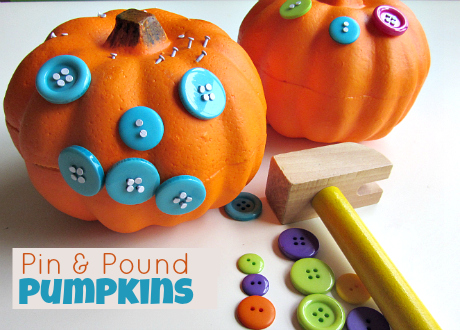
Pin and pound pumpkins
Pin & Pound Pumpkins - This is an activity both of my kids would love to do (ages 1 & 4). I think there is something about pounding things that kids find irresistible (the floor, their toys, the couch, each other). I'm pretty sure this is a better alternative than what I just listed...and a quieter alternative. ;)

Fall leaves made from wax paper and crayons
Wax Paper and Crayon Fall Leaves - I have yet to come across a kid who doesn't like to melt stuff. Melting crayons onto wax paper is cool, and I'm pretty sure all kids believe this. Plus, the added bonus is the fact you have super cute fall decorations to display in your home.

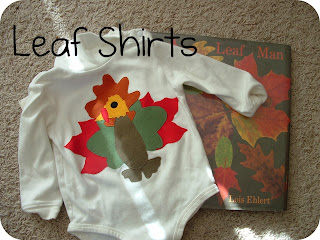
shirts made with leaf shapes
Leaf Picture Shirts - This is such a fun idea. Kids love creating their own shirts to wear and this is fun way for them to display their creativity. It involves a little more parental involvement and planning, but the results will be well worth it.

I'm super excited to try these activities with my kids! What kind of Fall activities do you do with your kids? Let me know how your projects go!