Supplies needed:
- glitter
- school glue (I used the clear kind, but the white kind works just as well)
- twine
- wax paper
- acrylic spray
- toothpick
- ornament hooks or paper clips
Start by laying out a sheet of wax paper.
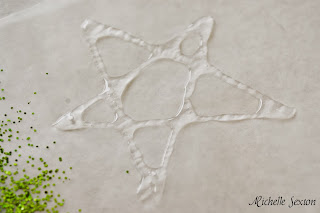
Using the glue, draw various shapes onto the wax paper. Squeeze the glue bottle firmly and pour slowly to create thick lines of glue. (Avoid bubbles in the glue as much as possible).
 |
| Avoid separations in the glue (like the one pictured) |
 |
| Use toothpick to connect separated sections of glue |
Make sure that each glue shape connects from beginning to end of shape. If the glue separates into sections, use a toothpick to connect the separated sections or add more glue to those areas.
Cover thoroughly with glitter. Allow to dry on a flat and level surface, preferably overnight. Once glitter and glue shapes have dried, spray with a coat acrylic spray. (This significantly reduces the glitter mess when handling shapes)
Gently peel the dried shapes off the wax paper. (Make sure glue is completely dry before peeling off the wax paper, otherwise the shapes tend to curl)
 |
| Originally I hung this on our piano. |
Hang (tape, tie, whatever way you choose) the twine in the desired spot to display the banner.
Using the ornament hooks (or paperclips) hook each glitter-glue shape and hang on various parts of the twine. If you have trouble with the ornaments staying in place, try hooking through the twine threads.
Liked the post? Let me notify you of new posts. Don't worry, I hate SPAM and won't abuse your email address. :)


4 comments:
I love how easy this craft is...and the fact that I have most of the supplies here on hand! Great idea! I'm glad I stopped by from Work It Wednesday!
So fun, I never knew you could do glitter/glue shapes like that. :)
Visiting from the Family Friday linky.
This is so cute! I have never seen this before! How amazing! Thank you so much for stopping by and sharing on Family Friday's Link-Up Party!
Ok these are TOO cool! And so fun! I bet my kids would LOVE to make these! I think we are going to try them this week!
Thanks for linking up to the Life of the Party. Im going to feature this tomorrow in a Christmas craft roundup :)
Post a Comment